
มีผู้ใจดีลงคลิปสอน Vue JS 3 ที่อัดไว้ตอนนำไปสอนอาจารย์ท่านอื่นๆ ให้เราได้เรียนรู้กันด้วย ซึ่งเคนลองดูแล้ว ดีมากๆๆ จึงอยากแนะนำคนที่อยากเรียนแบบเคนไปเรียนจากเพลย์ลิสต์นี้ได้เลย
ตอนนี้ดูถึงตอนที่ 9 น่าเสียดายตรงที่ เหมือนจะมีช่วงที่ขาดหายไประหว่างตอนที่ 7-8 คือ จบตอน 7 แล้วเปิดตอน 8 มันมีเรื่องที่หายไป คือเรื่อง refs, emits และการตกแต่งแบบฟอร์ม
ติดตั้งผ่าน Vite
Vite (วีท) (น่าจะ) เป็นเครื่องมือในการ Build โปรเจ็กต์ เห็นว่ากำลังฮิตเนื่องจากความเร็วในการ Build มันสูงมาก
yarn create vite my-vue-app --template vue
ส่วนเสริม VS Code ที่แนะนำ
settings.json ของ VS Code
{
  "editor.tabSize": 2,
  "editor.codeActionsOnSave": {
    "source.fixAll": true
  },
  "editor.formatOnSave": true,
  "css.lint.unknowAtRules: "ignore",
  "terminal.integrated.defaultProfile.windwos": "Command Prompt",
  "security.workspace.trust.enabled": false,
  "explorer.confirmDelete": false,
  "javascript.updateImportsOnFileMove.enabled": "always",
  "vite.autoStart": false
}
ติดตั้งแพคเกจของ Vue JS เพิ่มเติม
yarn add axios vue-router vue-i18n;

yarn add @intlify/vite-plugin-vue-i18n @vitejs/plugin-vue eslint eslint-config-standarad unplugin-vue-components vite-plugin-pages vite-plugin-vue-layouts vite-plugin-windicss -D;
เพิ่มไฟล์ .eslintrc.js
module.exports = {
  root: true,
  env: {
    browser: true,
    node: true,
  },
  extends: ['plugin:vue/vue3-recommended', 'standard'],
  plugins: ['vue'],
  rules: {
    'arrow-parens': 0,
    'generator-star-spacing': 0,
    'no-debugger': process.env.NODE_ENV === 'production' ? 2 : 0,
    'comma-dangle': [2, 'always-multiline'],
    'space-before-function-paren': 0,
    'object-curly-spacing': 0,
    'prefer-const': 0,
    'no-unneeded-ternary': ['error', { defaultAssignment: true }],
    'vue/max-attributes-per-line': 0,
    'vue/attributes-order': 0,
    'vue/require-default-prop': 0,
    'no-control-regex': 0,
    'vue/multi-word-component-names': 0,
    'vue/html-self-closing': 0,
  },
  globals: {},
};
แก้ไฟล์ vite.config.js
import { defineConfig } from 'vite';
import path from 'path';
import vue from '@vitejs/plugin-vue';
import Pages from 'vite-plugin-pages';
import Layouts from 'vite-plugin-vue-layouts';
import VueI18n from '@intlify/vite-plugin-vue-i18n';
import ViteComponents from 'unplugin-vue-components/vite';
import WindiCss from 'vite-plugin-windicss';

// https://vitejs.dev/config/
export default defineConfig({
  server: {
    host: '0.0.0.0',
    port: 3001,
    proxy: {
      '/api': {
        target: 'http://localhost:7001',
      },
    },
  },
  plugins: [
    vue(),
    Pages(),
    Layouts(),
    VueI18n({
      compositionOnly: false,
      include: [path.resolve(__dirname, 'locales/**')],
    }),
    ViteComponents(),
    WindiCss(),
  ],
});
แก้ไขไฟล์ main.js
import { createApp } from 'vue';
import { createRouter, createWebHashHistory } from 'vue-router';
import generateRoutes from 'virtual:generated-pages';
import { setupLayouts } from 'virtual:generated-layouts';
import 'windi.css';
import './style.css';
import App from './App.vue';

const routes = setupLayouts(generateRoutes);
const router = createRouter({
  history: createWebHashHistory(),
  routes,
});

const app = createApp(App).use(router);

Object.values(import.meta.globEager('./modules/*.js')).map((i) =>
  i.install?.({ app })
);

app.mount('#app');
แก้ไขไฟล์ App.vue
<template>
  <router-view></router-view>
</template>
สร้างโฟลเดอร์ layouts ใน src แล้วสร้าง Default.vue
เพิ่มที่ src/layouts เสร็จแล้วสร้างไฟล์ Default.vue ด้านในจะมี Layout เริ่มแรกจะเป็นแบบเดียวกับ App.vue
<template>
  <router-view></router-view>
</template>
สร้างโฟลเดอร์ pages ใน src แล้วสร้าง Index.vue
เพิ่มที่ src/pages เสร็จแล้วสร้างไฟล์ Index.vue
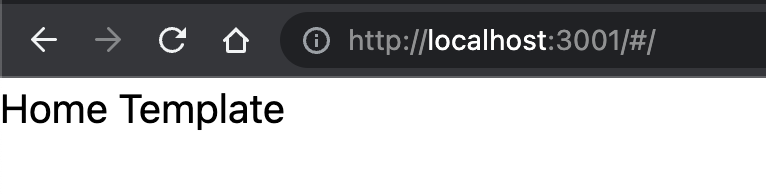
<template>Home Template</template>
ลองรันเซิร์ฟเวอร์
ด้วยคำสั่ง yarn dev ใน terminal แล้วเราควรจะเข้าหน้าแรกได้ตามปกติแบบนี้ โดยที่ URL จะมี /#/ ต่อท้าย localhost เป็นเรื่องปกติ ตอนแรกเคนก็คิดว่าไม่ปกติทำไมมี /#/ ต่อท้าย
การสร้างหน้าใหม่ๆ
หลังจากเราเซ็ตค่าเริ่มต้นโปรเจ็กต์ตามที่บอกมาข้างต้นแล้ว การเพิ่มหน้าใหม่ๆ สามารถเพิ่มได้ที่ src/pages โดยสร้างไฟล์ชื่อที่ต้องการ.vue ก็จะสามารถเข้า url ตามชื่อได้เลย เช่น
- About.vue สามารถเข้าที่ http://localhost:3001/#/about
- Contact-us.vue สามารถเข้าที่ http://localhost:3001/#/contact-us
หรือสามารถสร้างโฟลเดอร์เพื่อให้มันซับเข้าไปอีกก็ได้เช่นกัน เช่น สร้างโฟลเดอร์ admin ไว้ แล้วสร้างไฟล์ด้านในอีกที
- admin/Dashboard.vue สามารถเข้าได้ที่ http://localhost:3001/#/admin/dashboard